DIY Dried Flower Harvest Station
Capture the beauty of late-summer blooms and extend your garden's season with a simple home setup for drying flowers. From wreaths and bouquets to seasonal crafts and arrangements, this project helps you preserve what’s blooming now — and enjoy it long after the first frost.
Introduction
As the garden begins its slow transition into fall, many of the season’s most striking flowers and seed heads are at their peak. Instead of cutting them back and tossing them in the compost, why not save some for decorative use? Drying flowers is easy, low-cost, and a beautiful way to extend the joy of your garden into the colder months. Whether you're decorating your home, gifting handmade bundles, or prepping materials for winter wreaths, setting up a dried flower harvest station is a satisfying and practical project. All you need is a dry space, a little airflow, and a few garden tools — nature does the rest.
Materials Needed
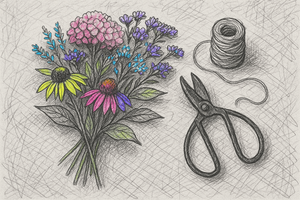
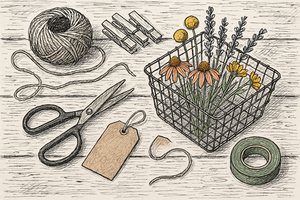
- Freshly cut flowers or seed heads (see recommended list)
- Sharp pruners or garden scissors
- Jute twine or string
- Clothespins or binder clips
- Drying rack, tension rod, or wall hooks
- Labeling tags (optional, for ID and dates)
- Optional: silica gel or wire for shaping stems
- Basket or bin for collecting stems
Step-by-Step Instructions
1. Choose what to harvest.
Select flowers and seed heads that are just past their peak but still holding shape and color. Avoid blooms that are overly soft, damp, or already browning. Morning is a great time to cut, once dew has evaporated but before full sun wilts the stems.
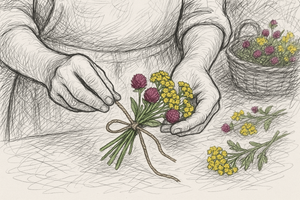
2. Gather and prep your cuttings.
Use sharp pruners to cut long stems (6 to 12 inches is ideal). Strip the bottom leaves to prevent mold during drying. Group like plants together and keep stems upright in a bin or basket until you're ready to hang.
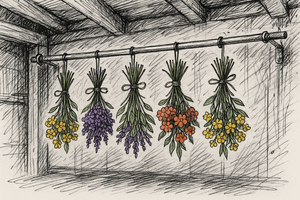
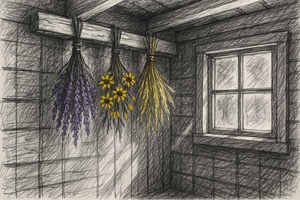
3. Build your drying setup.
In a dry, dark, and well-ventilated area — like a garage, shed, or even a closet — string twine between two hooks, or hang a tension rod across a windowless corner. Clip or tie small bunches upside down, spacing them a few inches apart for good airflow.
4. Hang and wait.
Drying typically takes 1 to 3 weeks depending on humidity and flower type. Keep the area out of direct sunlight to preserve color. You can tag each bunch with a date and plant name if you're drying multiple types.
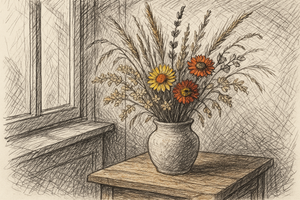
5. Store or use creatively.
Once fully dry, store flowers in cardboard boxes or paper bags, or move straight into arrangements. Use dried hydrangea heads in centerpieces, bundle coneflowers and grasses for rustic bouquets, or save seedpods for holiday decorations.
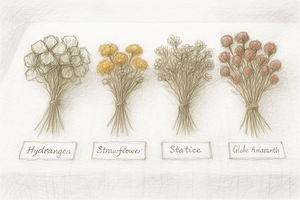
Best Flowers and Plants for Drying
These garden favorites hold their shape and color well once dried:
- Hydrangea paniculata – Let blooms fade slightly for cream or blush tones
- Yarrow (Achillea) – Flat flower heads dry beautifully and hold color
- Globe Amaranth (Gomphrena) – Keeps its shape and bright colors
- Strawflower (Xerochrysum) – Classic dry flower with vibrant hues
- Echinacea (Coneflower) – Use flower heads or seed cones
- Black-Eyed Susan (Rudbeckia) – Bold and cheerful even when dry
- Ornamental Grasses – Plume heads from Miscanthus, Panicum, and Pennisetum
- Lavender – Holds fragrance and color for sachets or bundles
- Celosia – Feathery or brain-shaped heads add dramatic texture
Tips for Success
Group small bunches with similar stem thickness and drying times together. Keep the drying area as dust-free as possible, and avoid high humidity zones like bathrooms or basements. For delicate blooms, consider using silica gel or pressing instead of air drying. If you want straighter stems for arrangements, wire the stems loosely while they dry. Once your flowers are dry, be gentle when handling—they’re more fragile than they look. Store in a cool, dry place if not using immediately.
Why We Love It
Drying flowers is a simple yet deeply satisfying way to celebrate your garden’s full cycle. It bridges the gap between seasons, turns excess blooms into beautiful decor, and gives you a tactile connection to your plants long after they've faded from the beds. It’s the kind of project that slows you down — in the best way possible.